By Root Freedom | Natural Wellness
Growing your own medicinal herbs is one of the most empowering things you can do for your health and your household. Instead of buying expensive supplements and dried herbs month after month, you step outside and harvest exactly what you need — fresh, organic, and free.
The best part? You don’t need a large yard, a green thumb, or any prior gardening experience. A windowsill, a patio, or a small patch of ground is enough to get started. We built our own medicinal herb garden from scratch and it has completely changed how we approach natural wellness at home. So this is a sample of How to Start a Medicinal Herb Garden From Scratch.
Here’s exactly how to do it.
Step 1 — Choose Your First 5 Herbs
Don’t try to grow everything at once. Start with 5 herbs that address your most common health needs. These are our top recommendations for beginners based on ease of growth and medicinal value:
Chamomile — for sleep, anxiety, and digestive calm. Easy annual that self-seeds prolifically.
Lemon Balm — for mood, anxiety, and mental clarity. Nearly indestructible perennial. Grows in almost any condition.
Peppermint — for headaches, digestion, and energy. Fast-growing perennial. Plant in a container to prevent spreading.
Lavender — for stress, sleep, and skin. Drought-tolerant perennial. Loves full sun and well-drained soil.
Echinacea — for immune support. Beautiful purple coneflower that returns every year and gets more productive with age.
All five are beginner-friendly, useful year-round, and available as seeds from Seeds Now. Starting from seed is the most economical option and Seeds Now carries non-GMO, organic varieties specifically chosen for medicinal use.
Step 2 — Choose Your Growing Space
You have more options than you think. Medicinal herbs are adaptable and forgiving.
Indoor windowsill garden: Perfect for apartments or small spaces. South or west-facing windows work best. Ideal herbs: chamomile, lemon balm, peppermint, and basil. Use 6-8 inch pots with good drainage.
Outdoor container garden: Patio, balcony, or deck. Use large containers — at least 12 inches deep for most herbs. The advantage of containers is mobility and weed control.
Raised bed garden: The gold standard for a serious medicinal herb garden. Build or buy a 4×4 or 4×8 raised bed, fill with quality soil, and you can grow 8-12 herb varieties comfortably.
In-ground garden: Dedicate a sunny corner of your yard. Most medicinal herbs prefer full sun — at least 6 hours daily. Prepare the soil with compost before planting.
Step 3 — Get the Right Soil
Herbs are forgiving but they have one non-negotiable requirement — good drainage. Roots sitting in waterlogged soil will rot.
For containers use a quality potting mix — not garden soil which compacts in pots. Add perlite for extra drainage if needed.
For raised beds and in-ground planting mix compost into your existing soil. A 50/50 mix of native soil and quality compost is ideal for most medicinal herbs.
Most herbs prefer a slightly alkaline soil pH between 6.0 and 7.0. You can get an inexpensive soil pH tester on AMAZON — worth having if you’re serious about your garden.
Step 4 — Start From Seed or Transplant?
Both work. Here’s how to decide:
Start from seed if: You want the most variety, the lowest cost, and the satisfaction of growing from the very beginning. Seeds take longer but give you complete control over the growing process. Seeds Now is our go-to source for medicinal herb seeds — non-GMO, high germination rates, and excellent variety selection.
Buy transplants if: You want faster results and don’t want to deal with seed starting. Most garden centers carry chamomile, lavender, peppermint, and lemon balm as small plants in spring. You’ll pay more but you’ll harvest sooner.
Our recommendation: Start lavender and echinacea as transplants since they’re slow to establish from seed. Start chamomile, lemon balm, and peppermint from seed — they germinate quickly and easily.
Step 5 — Plant at the Right Time
Timing depends on your climate zone but here are general guidelines:
Cool season herbs — chamomile and lemon balm can be direct sown in early spring as soon as soil is workable, or in fall for spring germination.
Warm season herbs — start lavender and echinacea indoors 8-10 weeks before your last frost date. Transplant outside after frost danger has passed.
Peppermint — plant anytime after last frost. It establishes fast and aggressively.
Not sure of your frost dates? Search “last frost date” plus your zip code — USDA plant hardiness zone maps are free online.
Step 6 — Basic Care Routine
Medicinal herbs are low maintenance once established. Here’s what they need:
Watering: Most herbs prefer to dry out slightly between waterings. Stick your finger 1 inch into the soil — if it’s dry, water deeply. If it’s still moist, wait. Overwatering kills more herbs than underwatering.
Fertilizing: Herbs don’t need much. Too much fertilizer produces lush leaves with less medicinal potency. A light application of compost in spring is usually enough.
Harvesting: Harvest in the morning after dew has dried but before the heat of the day — this is when essential oil content is highest. Never harvest more than one-third of a plant at once.
Pruning: Regular harvesting actually encourages bushier, more productive growth. Don’t be afraid to cut back aggressively — most herbs love it.
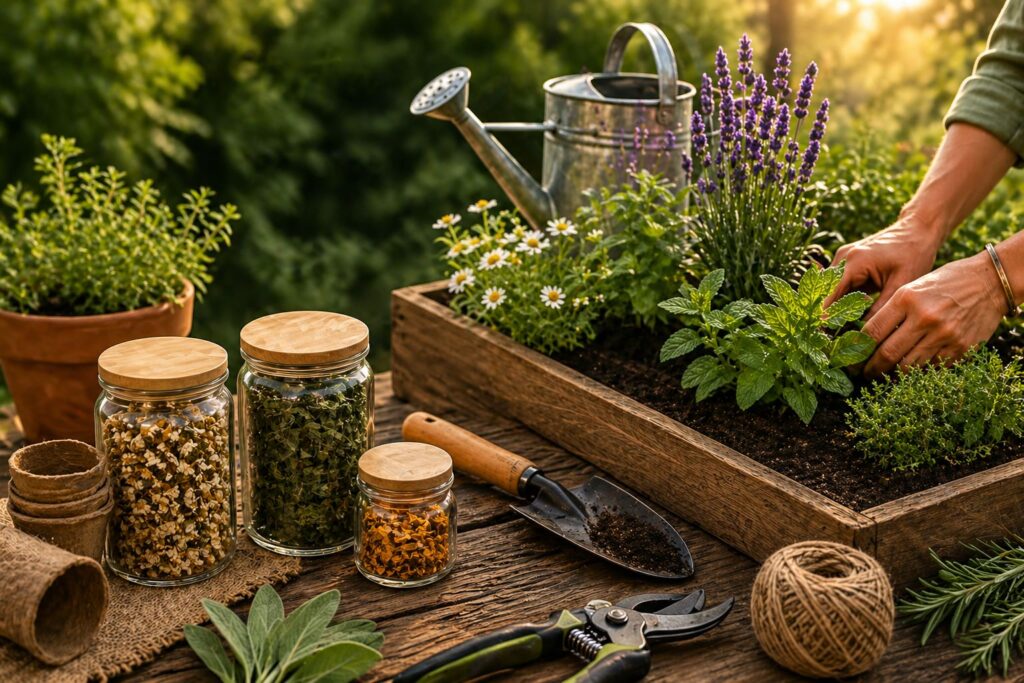
Step 7 — Dry and Store Your Harvest
Once you’re harvesting regularly you need a simple drying and storage system.
Air drying: Bundle 5-10 stems together with twine and hang upside down in a warm, dry, well-ventilated space away from direct sunlight. Most herbs dry completely in 1-2 weeks.
Dehydrator: Faster and more consistent. Set to 95-115°F for most herbs. Done in 2-4 hours. We recommend this one from Amazon.
Storage: Store dried herbs in airtight glass jars away from light and heat. Label with the herb name and harvest date. Most dried herbs maintain potency for 1-2 years.
Once you have dried herbs on hand you’re ready to make teas, tinctures, salves, and syrups — like our elderberry syrup recipe and echinacea tincture guide.
Your Starter Shopping List
Everything you need to get started:
- Medicinal herb seed collection → Seeds Now
- Quality potting mix → local garden center
- Soil pH tester → Amazon
- Glass storage jars → These airtight glass jars are perfect for storing dried herbs and keeping them fresh → Amazon
- Basic garden trowel (Amazon) and pruning shears → Amazon
- Dried herbs to supplement while your garden grows → Starwest Botanicals
The Garden That Keeps Giving
A medicinal herb garden is one of the best long-term investments you can make in your family’s health. The startup cost is minimal — a packet of seeds costs less than a single bottle of supplements — and the return compounds every year as your plants mature and spread.
Start small. Five herbs in five pots on a sunny patio is enough. Build from there as your confidence grows.
Related Posts You’ll Love
- 10 Herbs Every Natural Wellness Cabinet Needs — the essential herbs worth growing in your medicinal garden
- How to Dry and Store Herbs From Your Garden — once you’re harvesting you’ll need this guide
- How to Make Elderberry Syrup at Home — one of the first things to make with your garden harvest
- How to Make Echinacea Tincture at Home — turn your garden echinacea into a powerful immune tincture
- Best Herbs for Anxiety — grow the herbs that calm your nervous system naturally
- 3 Everyday Herbs to Calm Your Nerves — chamomile, lemon balm, and lavender grow beautifully in any garden
- The Herbal Academy Online Herbalism Courses — take your herbal knowledge further with beginner through advanced online courses taught by certified herbalists
Get the Free Herbal Wellness Checklist
Not sure which herbs to prioritize? Our free printable Herbal Wellness Checklist breaks down the 10 most essential herbs for a natural wellness cabinet — including growing tips for each one.
Click here to download your free Root Freedom Herbal Wellness Checklist →
Disclaimer: This post contains affiliate links. Root Freedom may earn a commission when you purchase through our links at no extra cost to you. This content is for informational purposes only and is not intended as medical advice.